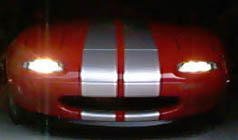
How to install a secondary set
of headlights, cont...
There's one way to avoid cutting your stock
wiring harness. I understand Moss Motors has a "twilight
lighting kit" that puts the running lights in the outermost
compartment of the lens assembly. If you get a set of these your
life will be simpler, electrially speaking. Click here for a wiring diagram,
courtesy of Nathan Hornig
If you understand this diagram, just build it. If
not, read on...
First identify the wires involved in your harness. There should be three: black, red, and green. Black is the ground, green is the turn indicator, and red is the parking light. Easy enough, right?
Now the commitment. Snip the three wires, close to the lightbulb socket. You'll be attaching them elsewhere. Give the socket to the cat to play with. Take the bulb out first, and keep the big o-ring as well. For the more ambitious, you can keep the socket and modify it to hold your new 9006 bulb in place. The cat will have to settle for something else.
Start wiring up the new turn indicator socket. Easy enough - just attach the green and black wires to the new socket. You can choose your own method of attachment, whether it be butt connectors, solder, or whatever. It doesn't matter what colour wires are coming out of the new socket. Do this to both sides, and set one aside - you're done with it.
Now the relay. Attach the red wire from the harness to the "86" pole of the relay.
Attach a new wire to the "85" pole of the relay. You can splice this into the one on the harness, or attach it to the car body later. If you've got coloured wire, black is a good one to use.
To the "87" (switching) pole of the relay, connect a wire to act as a power supply. I attached my fuse holder here, with an extension so I could reach power. Put a spade connector on the end of this one.
To the final pole (30 or 51) on the relay, attach two wires. One goes to your 9006 connector, the other (about 2 1/2 feet long) goes to your electrical connector. This latter wire is carrying power to your other light bulb, and you need the connector so you can get everything actually in the car.
The loose wire from the headlight connector needs to be attached to a ground. So does the second wire for the connector that's going to the second bulb. These can be attached to the body of the car somewhere - I used the radiator surround, as you'll see later.
Over on the other side of the car, attach the two wires coming out of your headlight connector to the other end of the plug you added in to the relay (two paragraphs above).
Clear as mud, right? Okay, the explanations leave a bit to be desired. If you're not comfortable working with electrical stuff, though, you should probably have some help. Again, feel free to contact me for any clarifications.