
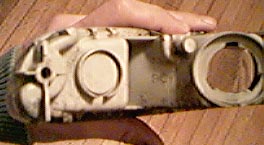
 You'll notice that on the stock lens assembly, there's a very obvious place to put a second bulb. You're
going to drill this out, and enlarge the opening so it goes to the outside of the little fence around the
edge. Here's before and after for you. This is messy. Little bits of plastic everywhere.
You'll notice that on the stock lens assembly, there's a very obvious place to put a second bulb. You're
going to drill this out, and enlarge the opening so it goes to the outside of the little fence around the
edge. Here's before and after for you. This is messy. Little bits of plastic everywhere.
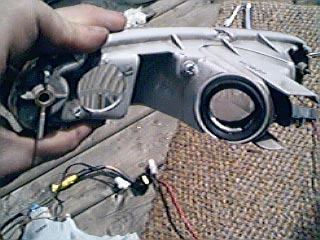 I used a drill with a big bit to get started, and then a routing bit on a Dremel tool to enlarge the hole
to what I needed. If you don't have a Dremel, you can file down the edges or spend a bit of time carving
with a knife. The exact shape is not that vital, but the hole needs to be large enough to let you get the
new bulb through.
I used a drill with a big bit to get started, and then a routing bit on a Dremel tool to enlarge the hole
to what I needed. If you don't have a Dremel, you can file down the edges or spend a bit of time carving
with a knife. The exact shape is not that vital, but the hole needs to be large enough to let you get the
new bulb through.
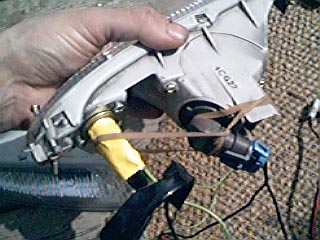
Now you can put the bulbs in. I re-used the o-ring from the original socket around the hole for the headlight bulb. I haven't yet come up with a great way to hold this in place - my prototype has a series of rubber bands. The other socket attaches with a couple of screws in my case. The yellow electrical tape was a stopgap measure for development. NOTE - The assembly with the relay should be for the left side of the car. I'll get a photo of this mess next time it's out of the car.
Now you've got a couple of lens assemblies and a nest of wires. Let's head back to the garage, shall we?